1140Merging Data and Automated Workflows in a Affinity Studio
→ Tested with Affinity Studio April '26 (4425) on MacOS 14.8.3
Problem: How to automate Catalogue Production in Affinity
Creating a catalogue involves copying and pasting assests, including texts, captions, names and images from data sources into Affinity. If the data source change, that process had to be repeated manually.
Solution: Data Merge!
Affinity offers the Data Merge feature which allows for the importing of structured data and the automatic generation of pages.
Overview of the Data Merge Process
-
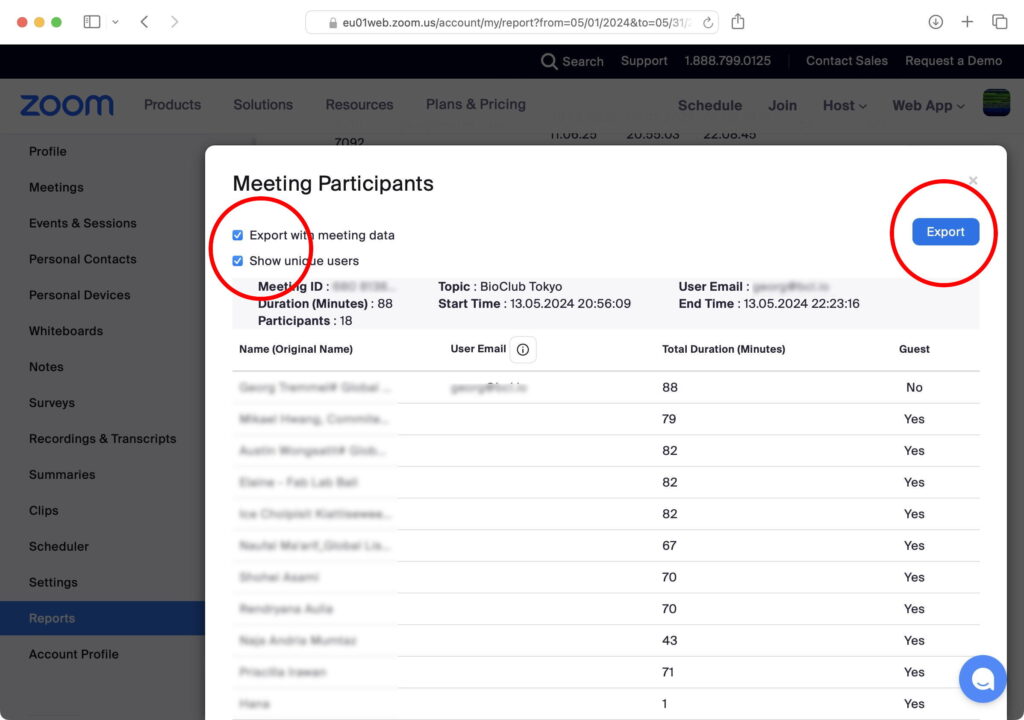
Create a source data file, in our example case we use Google Sheets to make a spreadsheet, which can be exported as CSV. Other source data types: Plain Text, CSV, TSV, JSON, XLSX
-
Create a Affinity Layout document, design the fields you want to be populated with data from the CSV file. Images can be imported from URLs or from folder relative to the main Affinity document.
-
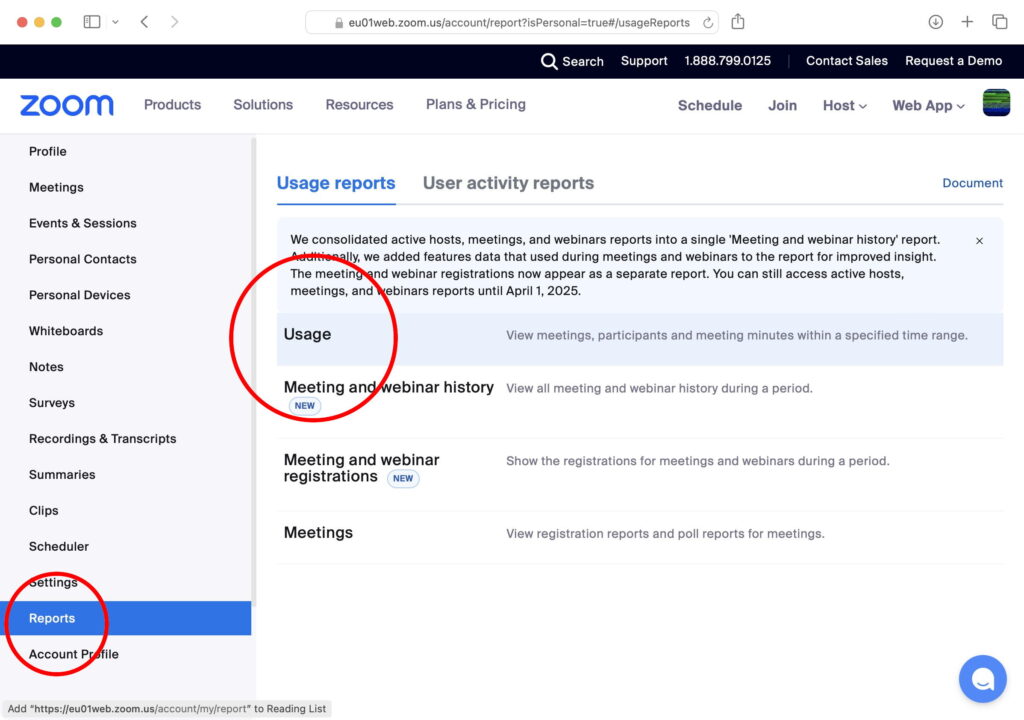
In Affinity, use the from
Window → Layout → Data Mergepanel to import the CSV file and bind the data to the visual elements. -
Generate a new Affinity document based to the design & data source.
1. Creating the Data Source
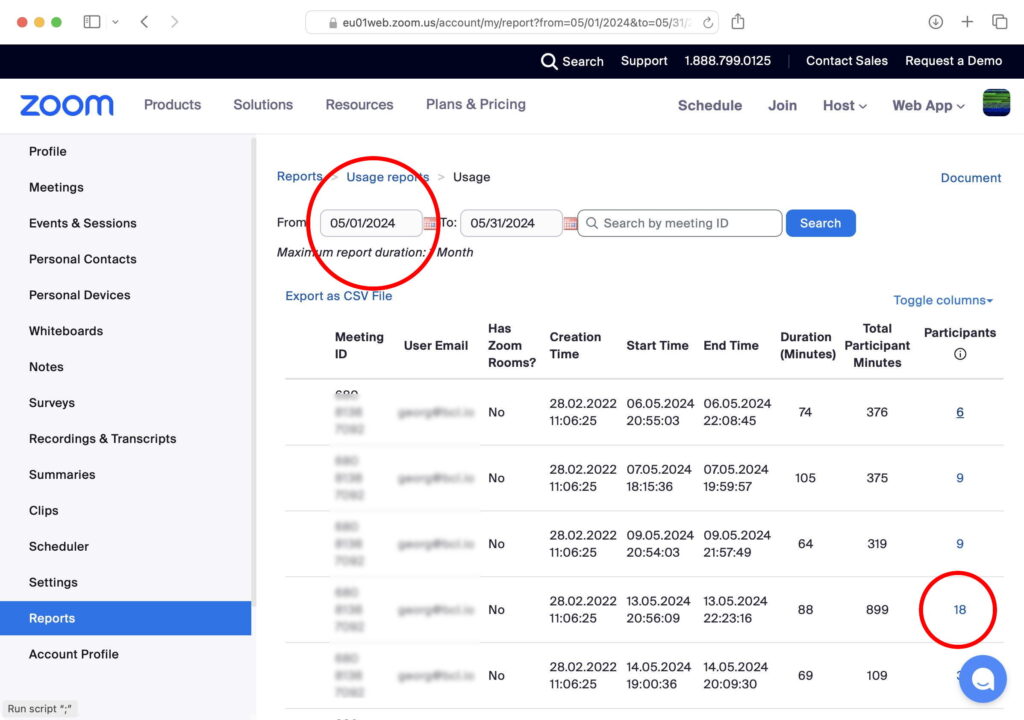
Any structured data source can be used, we will be using Google Sheets, as it allows for collaborative editing. Data from Google Sheets can be exported as CSV by doing File → Download → Comma-separated values (.csv).
Files
Challenges
Can a generated document be updated when the data source changes?
No. Each time the Generate Button in the Data Merge panel is clicked a new document is generated.
Can I import text styles from the CSV file?
No, that's not possible. However, each field can be given the desired styles. In the case of longer text with embedded styles, a workaround it to use Markdown syntax to indicate **bold** and _italic_ in the source file and then do Find & Replace in the Generated Document.


