1028Setting up GitHub Command-Line Access

This is a short, condensed instruction how to set-up command-line access to github.com. Written is response to onboard new FabAcademy students - and get them started with MkDocs.

This guides is for macOS 12 or higher. My Mac uses macOS Ventura 13.0.01.

Step 1: Creating a new SSH Key

Go to the .ssh directory.

$ cd ~/.ssh

Made new key:

$ ssh-keygen -t ed25519 -C "your_email@example.com"
  • Don't just copy, put in your email. I also added a password.
  • Also, don't copy the $, just the ssh-keygen -t ed25519 -C "your_email@example.com" part. But with your email.

You can name your key. For this example, we call it id_github_test.

Step 2: Adding SSH Key to ssh-agent.

$ eval "$(ssh-agent -s)"

Step 3: Adding Key Info to config

Open .ssh/config in your favourite text editor. If you want to stay at the command line, use nano.

Add the following:

Host *.github.com
  AddKeysToAgent yes
  UseKeychain yes
  IdentityFile ~/.ssh/id_github_test

Step 4: Adding the Key to ssh-agent

Adding private key to ssh-agent

$ ssh-add --apple-use-keychain ~/.ssh/id_github_test

This add the new key to the Apple Keychain.

If you used a passphrase when you created the key, you will be asked for it now.

Enter passphrase for /Users/georg/.ssh/id_github_test: 
Identity added: /Users/georg/.ssh/id_github_test (your_email@example.com)

Step 5: Adding Public Key to github.com

  • Log into Github
  • Profile > Settings > SSH and GPG Keys
  • Click 'New SSH Key'

Copy and paster your public key, in this example case, id_github_test.pub.

The tutorial on Github suggest to copy the public key using a command:

$ pbcopy < ~/.ssh/id_github_test.pub      

pbcopy - for paste board copy is the terminal interface to the macOS' Copy & Paste. pbcopy < read the content of a file into the copy memory. After running pbcopy you can press Command-V to paste the text.

  • Paste the copied SSH Public Key.

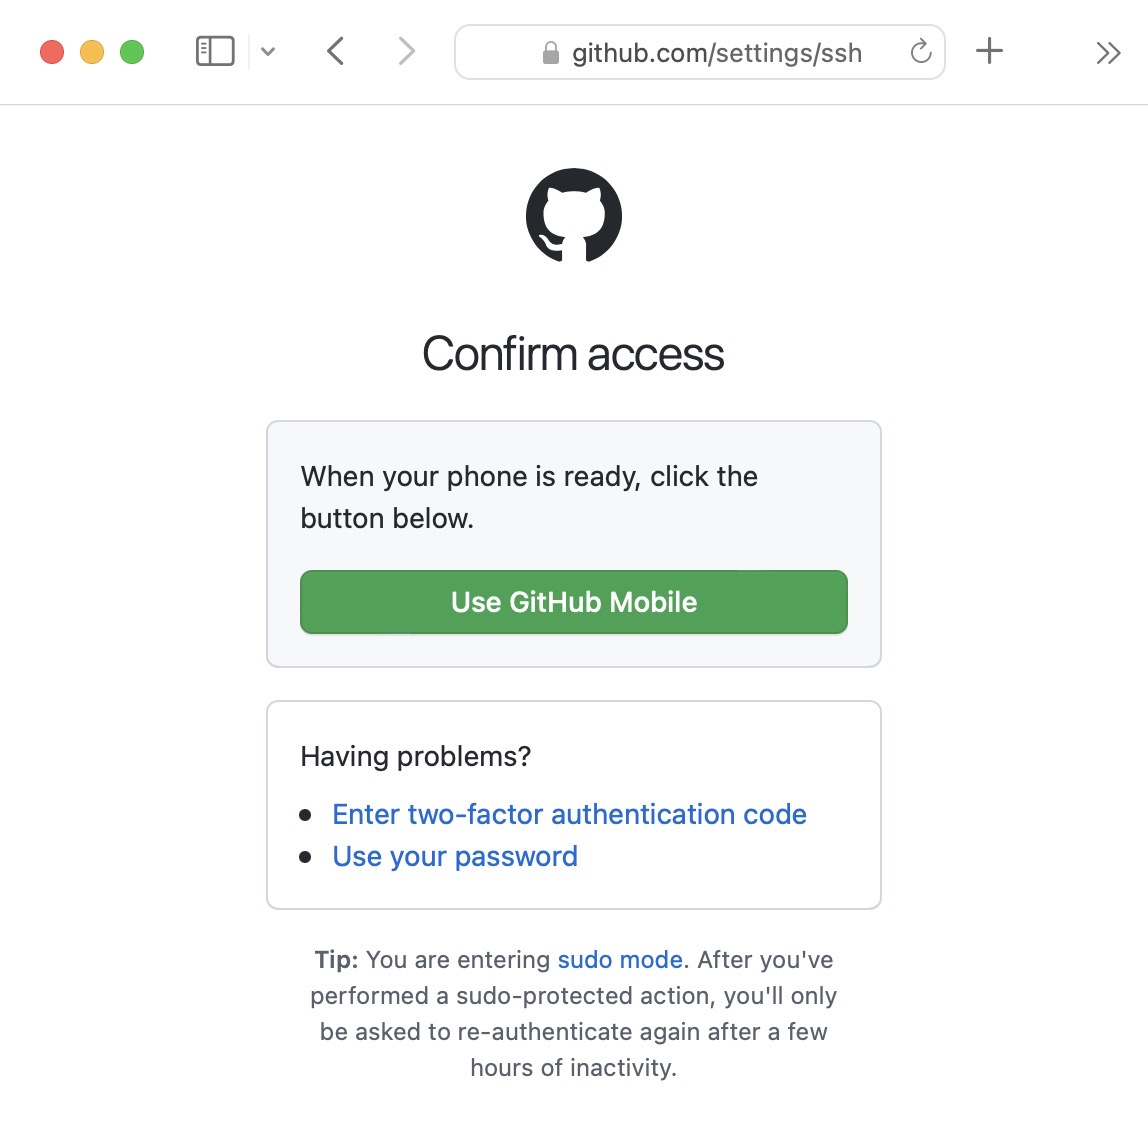
Step 5.1: Two-Factor Authentication at GitHub.com

I setup Two-Factor Authentication at GitHub.com, I had to confirm the addition of a new key via my mobile GitHub App. Your mileage might vary.

Step 6: Testing the connection

$ ssh -T git@github.com
Hi trembl! You've successfully authenticated, 
but GitHub does not provide shell access.

Ok, great! It worked!

Now you can clone, add, commit, push and pull!

Sources:

1027SSH Key Permissions too open

This warning is pretty self- explanatory:

@@@@@@@@@@@@@@@@@@@@@@@@@@@@@@@@@@@@@@@@@@@@@@@@@@@@@@@@@@@
@         WARNING: UNPROTECTED PRIVATE KEY FILE!          @
@@@@@@@@@@@@@@@@@@@@@@@@@@@@@@@@@@@@@@@@@@@@@@@@@@@@@@@@@@@
Permissions 0644 for '/Users/georg/.ssh/my_rsa_key' are too open.
It is required that your private key files are NOT accessible by others.
This private key will be ignored.

Solution

Limit the key to read/write access by the user only:

chmod 600 ~/.ssh/my_rsa_key

It's also possible to make it only readable by the user, but then you need to chmod every time you want to update/change it.

chmod 400 ~/.ssh/my_rsa_key

Sources: StackOverflow

1019Importing Screenshots to Photos with Automator

A simple Automator Action to import Screenshots in OSX into Photos:

  • Select the Folder to which the Action is attached
  • "Add to existing top-level album" - called "Screenshots"

I also have my Screenshots Folder on Dropbox, the Folder Actions are attached to that Folder.

999Running Repetitive Jobs on OSX

Traditionally Unix systems use crontab to schedule and run repetitive jobs, OSX uses launchd, an init and operating system service management daemon.

Here is a script that call my index.php every 120 seconds. (I am download snow webcams in the index.php.)

<?xml version="1.0" encoding="UTF-8"?>
<!DOCTYPE plist PUBLIC "-//Apple//DTD PLIST 1.0//EN" "http://www.apple.com/DTDs/PropertyList-1.0.dtd">
<plist version="1.0">
<dict>
  <key>Label</key>
  <string>org.trembl.snow</string>
  <key>ServiceDescription</key>
  <string>Getting Snow Pictures</string>
  <key>ProgramArguments</key>
  <array>
    <string>/Applications/XAMPP/bin/php</string>
    <string>/Applications/XAMPP/xamppfiles/htdocs/snow/index.php</string>
  </array>
  <key>RunAtLoad</key>
  <true/>
  <key>StartInterval</key>
  <integer>120</integer>
</dict>
</plist>

In Xcode, the same script looks like this:

Troubleshooting

I made a couple of errors, trying to get the script to run.

  1. Permissions sudo chown <user>:staff org.trembl.snow.plist
    Incorrect permissions also cause the Load failed: 122: Path had bad ownership/permissions

  2. The name of the file and the Label need to match. org.trembl.snow and org.trembl.snow.plist

  3. The plist need to be placed into ~/Library/LaunchAgents.

  4. If your Program has arguments, they need to be specified in an array:

    <key>ProgramArguments</key>
    <array>
    <string>/Applications/XAMPP/bin/php</string>
    <string>/Applications/XAMPP/xamppfiles/htdocs/snow/index.php</string>
    </array>
  5. Both strings need to be absolute. I got this error: Load failed: 122: Path had bad ownership/permissions, which was caused by only saying index.php instead of the whole absolute path.

  6. Use launchctl bootstrap and not the obsolete launchctl load.

  7. Launch with sudo launchctl bootstrap gui/`id -u` ~/Library/LaunchAgents/org.trembl.snow.plist

  8. Stop: sudo launchctl bootout gui/`id -u` ~/Library/LaunchAgents/org.trembl.snow.plist

981sed, -i and the macOS

Doing a Search and Replace on the shell should not be difficult:

find . -name "*.html" -exec sed -i "s/searchPattern/replacePattern/g" {} +

However, on macOS this error message occurs:

sed: 1: "./aaa/a ...": invalid command code .
sed: 1: "./aaa/b ...": invalid command code .
sed: 1: "./aaa/c ...": invalid command code .
...

It turns out, on MacOS the -i parameter needs to be followed by an empty string:

find . -name "*.html" -exec sed -i "" "s/searchPattern/replacePattern/g" {} +

979Batch Rename Files with rename

Batch renaming files on the command line, in this case screenshot to more descriptive names:

brew install rename

Dry run:

rename -n -e 's/Screen Shot/w2_OpenSCAD/' -z  *.jpg

Replace, remove the -n flag:

rename -e 's/Screen Shot/w2_OpenSCAD/' -z  *.jpg

-z does sanitize the file name, replacing empty spaces with _.

978Changing default Screenshot Form in OSX

Default format is PNG, change it to any of the following:

defaults write com.apple.screencapture type JPG
defaults write com.apple.screencapture type TIFF
defaults write com.apple.screencapture type GIF
defaults write com.apple.screencapture type PDF
defaults write com.apple.screencapture type PNG

First encountered here.

976Git, Mac, SSH Keys and the OSX Keychain

When using git with a key that has a passphrase, you are asked the passphrase every time you pull/push. To make this a bit more convenient, add the key to the OSX Keychain.

Store key in OSX Keychain:

ssh-add -K ~/.ssh/my_key

Open .ssh/config

Host *
  UseKeychain yes
  AddKeysToAgent yes
  IdentityFile ~/.ssh/my_key

959Making a Bootable Installer for OSX

Straight from the Apple Support page: How to create a bootable installer for macOS https://support.apple.com/en-us/HT201372 High Sierra Page https://support.apple.com/en-us/HT208969 High Sierra App Store Link (hidden from standard Search) https://itunes.apple.com/us/app/macos-high-sierra/id1246284741?ls=1&mt=12

951Making a Bootable USB Stick – for Linux – in OSX

The Manjaro Wiki suggests to make a bootable USB Stick like that:

sudo dd bs=4M if=/path/to/manjaro.iso of=/dev/sd[drive letter] status=progress oflag=sync

While this might work on Linux, it does not work with dd on OSX/Darwin. Here are the error messages:

dd: bs: illegal numeric value
bs does not understand M
multiply manually, 4M -> 4 1024 1024 -> 4194304

sudo dd bs=4194304 if=/path/to.iso of=/dev/diskNr status=progress oflag=sync

dd: unknown operand status
dd on OSX does not understand the status flag
remove status flag

sudo dd bs=4194304 if=/path/to.iso of=/dev/diskNr oflag=sync

dd: unknown operand oflag
dd on OSX does not understand the oflag oflag
remove oflag flag

sudo dd bs=4194304 if=/path/to.iso of=/dev/diskNr

dd: /dev/disk4: Resource busy
Unmount disk before use, either via umount or in Disk Utility

And here we have it:

sudo dd bs=4194304 if=/path/to.iso of=/dev/diskNr